Table of Contents
There was a time when every new inquiry felt like another item added to my never-ending to-do list. A new lead would come in, and I’d find myself opening emails, copying details, updating a sheet, drafting a reply… and if I got busy, a few leads slipped through the cracks. Losing potential clients because I couldn’t reply fast enough felt frustrating—and unnecessary.
That’s when I decided to build my own automation emailer. I didn’t want to pay for Zapier, didn’t want complicated integrations, and definitely didn’t want to learn a full programming language. What I eventually created surprised me: a complete, free automation system built using only Google Forms, Google Sheets, Gmail, and a small script.
In this guide, I want to walk you through exactly how I built it—step-by-step—just like I wish someone had shown me earlier.
If your business depends on leads—even a small number—you probably know the painful cycle well:
This system isn’t just slow—it’s risky. A single missed lead could mean a lost customer. And when your response time decides whether a lead chooses you or someone else, every minute matters.
That’s what pushed me to automate my process. I wanted a system that worked even while I slept. A system that sent personalized follow-up emails instantly, every time.
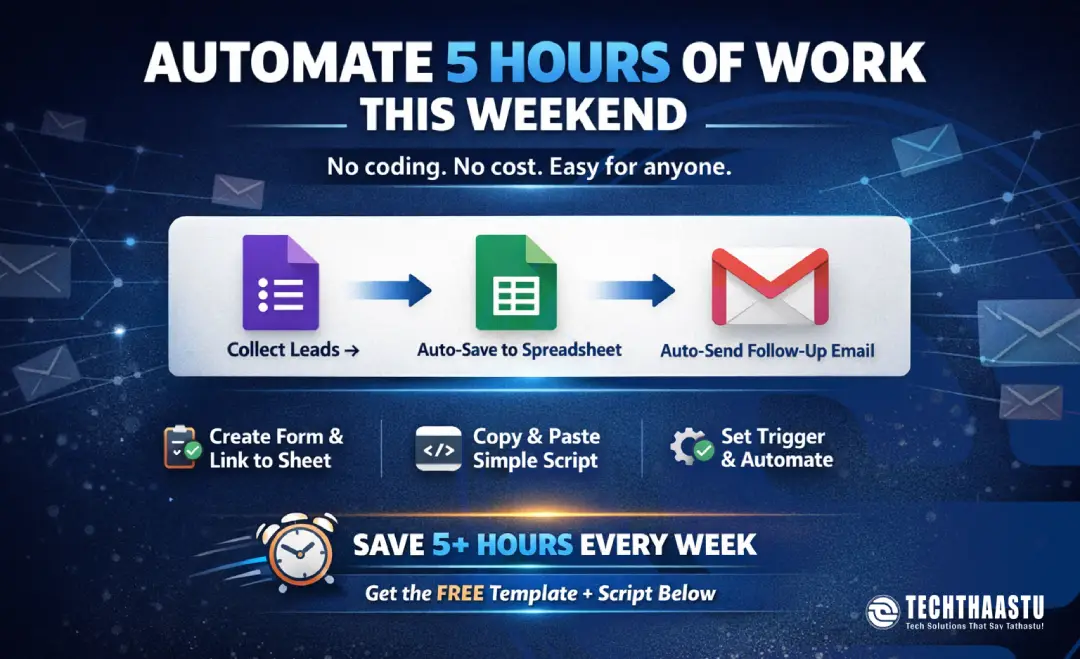
An automation emailer is simply a setup where emails are triggered automatically when something happens. In my case, the “trigger” is a form submission. When someone fills out a Google Form, their details flow into a Google Sheet, and the system immediately sends them a customized follow-up email.
No clicking. No typing. No delays.
The beautiful part? You don’t need any expensive tools. Google already gives you everything you need for free.
This is the exact flow I use:
It’s simple, fast, and surprisingly powerful.
Here’s how I built the entire automation system from scratch.
Start by creating a Google Form that collects the details you need. I keep it simple with just three fields:
This last field helps make your automated email feel more personal instead of robotic.
Inside your form:
Google creates and links a spreadsheet automatically. You’ll see all form fields appear as columns—this is where your automation script will pull information from.
In the linked Google Sheet:
Here is the exact script I use, and it works perfectly for sending follow-up emails automatically:
function sendAutoFollowUp(e) { var sheet = SpreadsheetApp.getActiveSpreadsheet().getActiveSheet(); var lastRow = sheet.getLastRow(); var name = sheet.getRange(lastRow, 2).getValue(); var email = sheet.getRange(lastRow, 3).getValue(); var customLine = sheet.getRange(lastRow, 4).getValue(); var subject = "Thanks for connecting with us, " + name + "!"; var body = ` Hi ${name}, Thank you for reaching out. Your message: "${customLine}" We will get back to you shortly. Regards, Techthaastu Team https://techthaastu.com `; MailApp.sendEmail(email, subject, body); } This script pulls the latest form entry, formats a simple email, and sends it through Gmail without delay.
Now we make the script run automatically whenever a new form submission arrives:
You're done. Your automation emailer is officially live.
Make sure your trigger is set to On Form Submit.
Run the script once manually and allow permissions.
The script reads specific columns. If your Google Sheet columns move, update the script’s column numbers accordingly.
This small system works beautifully in many scenarios:
It’s almost like having a silent assistant who never forgets, never delays, and works 24/7.
Once you set it up, it feels like magic.
Building this automation emailer transformed the way I handle inquiries. Instead of worrying about delayed replies or missed leads, I now have a simple system that responds instantly, logs everything neatly, and feels wonderfully reliable. If you’ve been thinking about automating your business but didn’t know where to start, this free method is the perfect first step.
Once you set it up, you’ll wonder how you ever worked without it.
Explore blogs you should also liked

SEO, AEO, and GEO strategies that work in 2026 — updated Core Web Vitals thresholds, what replaced guest posting, and how to get cited by AI search.
Updated On: 2026-07-11 21:11:30
Read More
Learn how to grow your spa business with a proven Spa Business Growth Plan — increase online bookings, retain clients, and build a recurring customer base using digital marketing and smart IT systems.
Updated On: 2026-03-23 12:35:19
Read More
Discover how Meta’s Andromeda engine is transforming Advantage+ automation with smarter, personalized ad retrieval. Learn real-world use cases and benefits for advertisers.
Updated On: 2026-03-18 16:19:20
Read More
Learn how I use LinkedIn Ad Measurement to improve ROI, lower cost per lead, track conversions, and turn B2B campaigns into real business growth with a simple performance framework.
Updated On: 2026-01-19 21:32:06
Read MoreJust send us a mail.
Techthaastu Private Limited, Pt. Mehru Marg, Near Govt. Girls Senior Secondary School(Bijwasan), vill. Bharthal, Dwarka sector 26, New Delhi, India 110077
Techthaastu Support Team
Typically replies within an hour